How to Use WSL2 With A GUI

The Windows Subsystem for Linux is a tool to allow developers to run GNU/Linux environments, in a native hypervisor, in an extremely low-intensity manner. WSL provides many benefits to developers, such as allowing access to the Windows file system, providing the ability to use Linux-exclusive software, tools, and features, and much more.
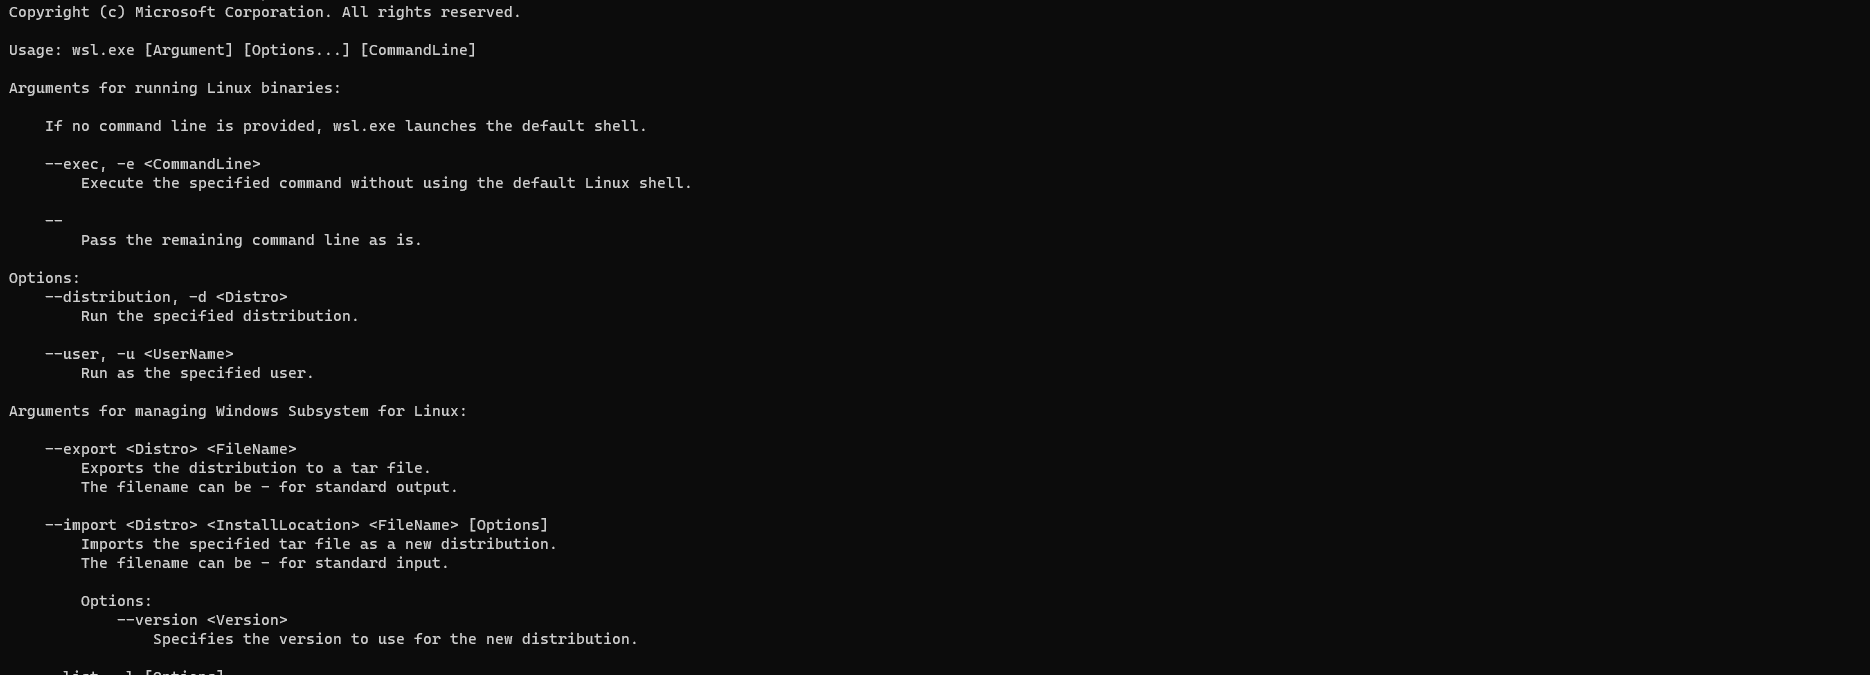
Typically, WSL is a command-prompt-based utility, which serves most developers’ needs, however, a graphical interface is necessary in some cases – but it is rather complicated to configure. In this tutorial, we will setup a GUI in WSL2, and access it using VNC. No additional software outside WSL (like VcXsrv) is required, except, of course, a VNC Viewer.
Upgrading WSL to WSL2 & Installing Dependencies
tigervnc-standalone-server and systemd-genie.
For this setup, I will use Ubuntu 18.04 LTS (Bionic Beaver) and install GNOME desktop. Because the key components aren’t tied to Ubuntu or GNOME, you are free to choose your favorite distro and GUI, and it won’t be affected by the installation. Let’s get started – first, we need a working WSL2 installation.Important note: WSL2 is different than WSL – if you don’t currently have WSL2, you should update before proceeding.
					sudo apt-get update
sudo apt-get dist-upgrade -y
sudo apt-get install curl wget -y
Installing Components
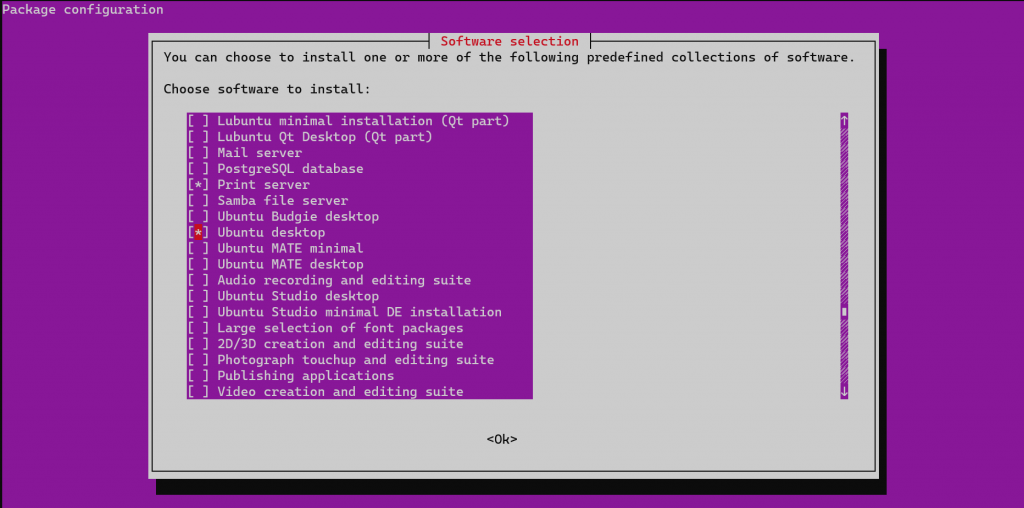
sudo apt-get install tasksel -y
sudo tasksel
At the package list, select your preferred GUI. I installed Ubuntu Desktop. The installation will take a while, so be patient, and maybe grab a coffee while you wait.
Installing VNC Server
sudo apt-get install tigervnc-standalone-server -y
Installing the dotnet-runtime
systemd-genie requires the dotnet-runtime but is not installed automatically. If you are installing on Ubuntu 18.04 (Bionic Beaver), follow the commands below. If you are using a different OS or version, follow this installation.
Here are the commands to install dotnet-runtime-5.0 on Ubuntu 18.04:
					wget https://packages.microsoft.com/config/ubuntu/18.04/packages-microsoft-prod.deb -O packages-microsoft-prod.deb
sudo dpkg -i packages-microsoft-prod.deb
sudo apt update
sudo apt install dotnet-runtime-5.0
Installing systemd-genie
systemd-genie which is responsible for turning the basic WSL2 framework into a more complete, comprehensive Linux kernel. This is necessary to run GDM (GNOME Display Manager) and/or LightDM properly, giving the user a full graphic interface experience, including the login page, and related features. Here are the install instructions. As of the publication of this article, the codebase currently supports Ubuntu Focal and Bionic, as well as Debian Buster, Bullseye, Bookworm, and sid. For other distros, you must check how to get the appropriate package for your system. The following commands will install systemd-genie on your system, as long as it is supported:
					sudo apt-get install apt-transport-https -y
sudo wget -O /etc/apt/trusted.gpg.d/wsl-transdebian.gpg https://arkane-systems.github.io/wsl-transdebian/apt/wsl-transdebian.gpg
sudo chmod a+r /etc/apt/trusted.gpg.d/wsl-transdebian.gpg
source /etc/os-release
cat << EOF | sudo tee /etc/apt/sources.list.d/wsl-transdebian.list
deb https://arkane-systems.github.io/wsl-transdebian/apt/ $VERSION_CODENAME main
deb-src https://arkane-systems.github.io/wsl-transdebian/apt/ $VERSION_CODENAME main
EOF
sudo apt-get update
sudo apt-get install systemd-genie -y
Configure your environment
Creating VNC Server passwords
vncpasswd
Next, let’s configure the password for the root user:
sudo -H vncpasswd
Finally, let’s configure the VNC password for GDM (you need to skip this step if you didn’t install GNOME):
sudo -H -u gdm vncpasswd
Replacing default X by Xvnc
By default, the display manager calls multiple X instances, one for each user session, including the login screen, all provided by gdm. To change this, we are replacing the Xorg script with a new version which calls Xvnc instead of the classic X/Xorg display service. This IS the real magic we are doing.
First, let’s backup the original Xorg script:
sudo mv /usr/bin/Xorg /usr/bin/Xorg_old
Then, we create a new Xorg script and copy and paste the bash script into the file:
sudo nano /usr/bin/Xorg_new
					#!/bin/bash
for arg do
  shift
  case $arg in
    # Xvnc doesn't support vtxx argument. So we convert to ttyxx instead
    vt*)
      set -- "$@" "${arg//vt/tty}"
      ;;
    # -keeptty is not supported at all by Xvnc
    -keeptty)
      ;;
    # -novtswitch is not supported at all by Xvnc
    -novtswitch)
      ;;
    # other arguments are kept intact
    *)
      set -- "$@" "$arg"
      ;;
  esac
done

# Here you can change or add options to fit your needs
command=("/usr/bin/Xvnc" "-geometry" "1024x768" "-PasswordFile" "${HOME:-/root}/.vnc/passwd" "$@")

systemd-cat -t /usr/bin/Xorg echo "Starting Xvnc:" "${command[@]}"

exec "${command[@]}"
					sudo chmod 0755 /usr/bin/Xorg_new
sudo ln -sf Xorg_new /usr/bin/Xorg
Configure Environment Variables
genie command. To do this, we are going to modify the .bashrc files of both the main user, which you created during the installation of your WSL OS, as well as the root user. First, open the file:
nano ~/.bashrc
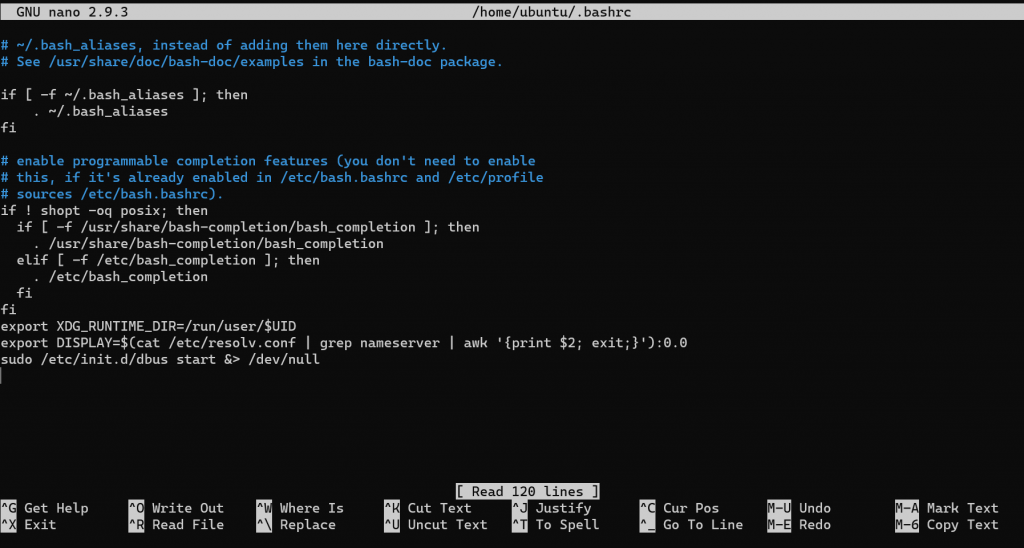
Then add the following lines to the bottom of the file:
					export XDG_RUNTIME_DIR=/run/user/$UID
export DISPLAY=$(cat /etc/resolv.conf | grep nameserver | awk '{print $2; exit;}'):0.0
sudo /etc/init.d/dbus start &> /dev/null
.bashrc file, do this with the following commands:
Switch to the root user:
sudo su
.bashrc file as your root user, and append the same three lines you used in the previous step to the file:
					export XDG_RUNTIME_DIR=/run/user/$UID
export DISPLAY=$(cat /etc/resolv.conf | grep nameserver | awk '{print $2; exit;}'):0.0
sudo /etc/init.d/dbus start &> /dev/null
source ~/.bashrc
Running systemd-genie
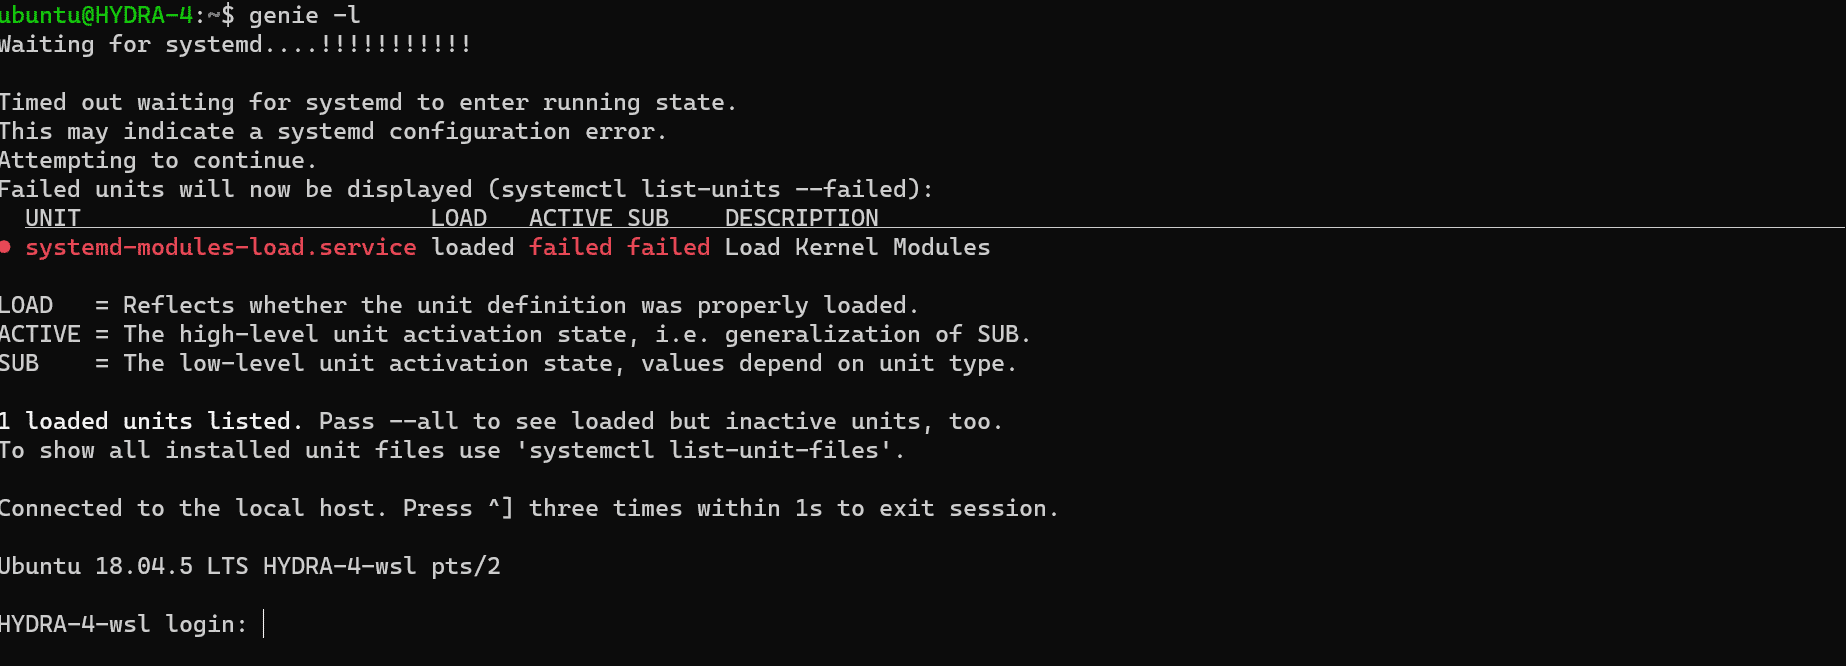
systemd. Because of systemd, gdm will start automatically and will create a X instance to display the login interface. We changed this process to make it create Xvnc instances, so we can access them. The first instance will listen to port 5900, the second instance will listen to port 5901, and so on. This command will show a “connecting to systemd” message for 180 seconds, before giving you a few errors, and prompting you to log in – log in with the credentials you created at initial installation of the OS. Attention: if you want to avoid initialization errors that show up upon genie start, or make it start faster, you must check this page.
genie -l
hostname -I
Accessing the VNC Screen

sudo nano /etc/gdm3/custom.conf
Uncomment and edit the following lines:
					AutomaticLoginEnable=true
AutomaticLogin=[your username without the brackets]
Shutting Down
Power off option on GUI menu
sudo init 0,inside the genie bottle
genie -u, or outside the genie bottleAfter doing that, you can safely shut down your WSL instance, either by
wsl --terminate or wsl --shutdown. Not doing the shutdown process may cause damage to your WSL instance, so please be careful and bear that in mind.